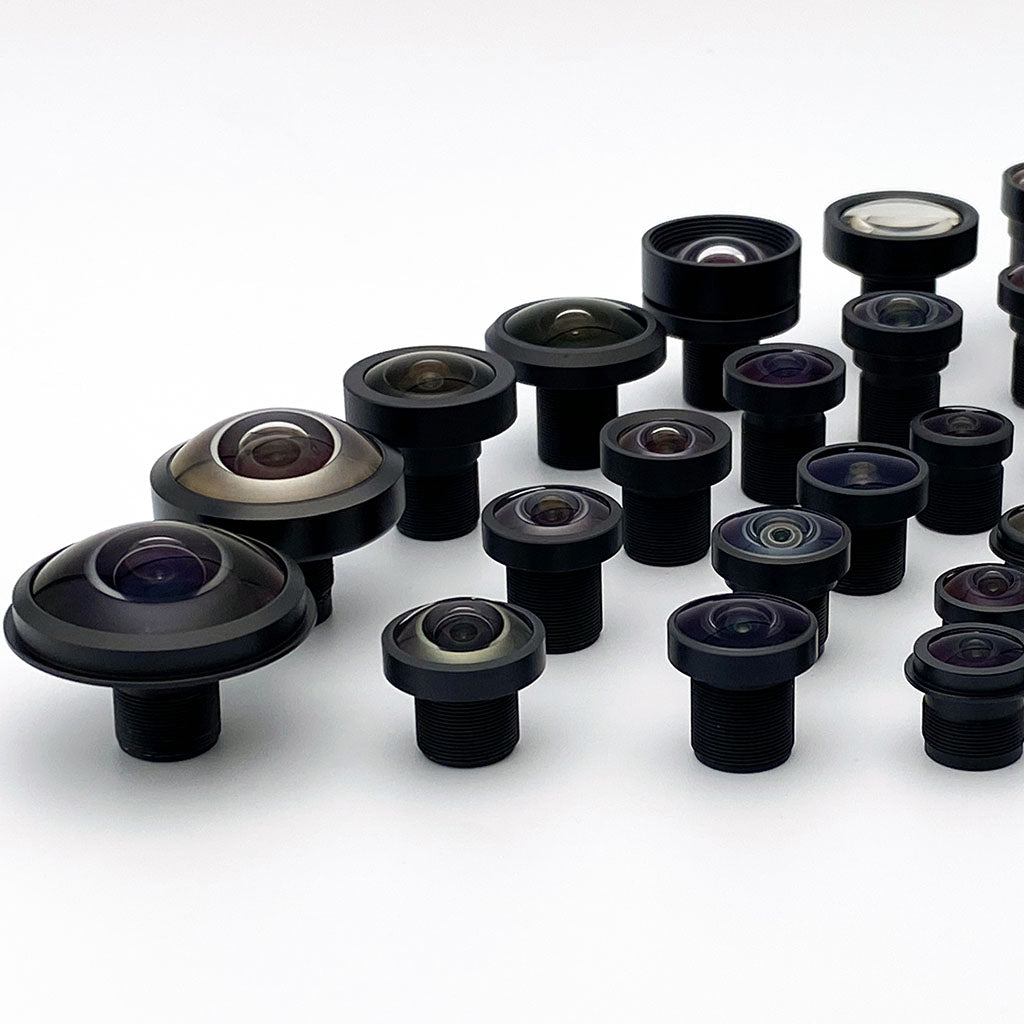

What Are the Physics Behind Camera Focus?
Camera focus happens when light rays from your object converge precisely onto the image sensor.
The distance between lens and sensor where sharp focus occurs is the lens-to-sensor spacing, not the back focal length, a fixed rear-vertex-to-rear-focal-point distance at infinite conjugate (Smith, Modern Optical Engineering, 4th ed.). Adjusting focus changes this spacing to match the working distance.
For M12 lenses, each full rotation moves the lens 0.5mm (the M12×0.5 thread pitch). How far the object plane moves depends on the conjugates. The differential |Δu| ≈ (u/f)² × |Δv| (u working distance, f focal length, Δv axial travel) holds for small rotations only. Over a full turn it badly overshoots.
For a full turn, use the exact thin-lens conjugates: v = uf/(u − f), v′ = v + 0.5mm, u′ = v′f/(v′ − f). A 4mm lens focused at 300mm refocuses near 33mm, a swing of roughly 267mm. An 8mm lens lands near 97mm, roughly 203mm. One full turn is a coarse move. Step 5 below works in 1/16-turn increments.
C-mount lenses work differently: you turn a focus ring instead of threading the whole lens. What the ring drives is design-specific: some designs move internal groups on a cam, while others use unit focusing (the whole cell in a helical), front-cell focusing, or fixed focus.
Key Terms You'll Need
Effective Focal Length (EFL): Determines your field of view and depth of field. This is what lens specs typically list (e.g., "4mm lens").
Mechanical Back Focal Length: Distance from a rear mechanical reference on the lens housing to the sensor. M12 has no standardized flange, so the reference surface varies by vendor. Take it from the specific lens drawing. This determines if a lens physically fits your camera.
Flange Focal Distance: For C-mount systems, this is standardized at 17.526mm from the mount flange to the sensor.
Note: Optical back focal length, from the last optical surface to the image plane, is what the designer budgets against the IR-cut filter and cover-glass stack, rear-element clearance, and the exit pupil position that sets chief ray angle. Mechanical back focal length, from the vendor-defined rear housing reference, tells you whether a lens fits and reaches focus.
Browse Commonlands M12 lenses or C-mount lenses, and check your sensor's pixel size and optical format on our image sensors reference. The lens image circle must cover the sensor's full diagonal.
How Do I Focus an M12 Lens?
M12 focusing means systematically threading the lens while monitoring image sharpness. Each rotation moves it 0.5mm. Use a stable target at the intended working distance and compare focus across the field.
Thread tolerance mismatches between M12 lenses and holders often leave the lens sitting at a slight angle, making one side of the image sharp and the other blurry, a problem detailed in our M12 lens technical guide. Align the target with the sensor plane before judging lens performance. A level ceiling fixture can help establish target geometry, but lens-to-sensor tilt requires mechanical alignment of the lens, holder, or sensor. Aiming upward does not correct it.
Mount Camera Securely
Fix the board level camera rigidly, either facing your target or pointing upward for the ceiling target method. Even small movements during focusing will affect results.
Position Test Charts
Place four test charts halfway from center to corner, at 0.5 field height. Unequal sharpness among them flags a problem, but not its cause: sensor tilt, field curvature, astigmatism, and decentered elements can all look alike here. Through-focus checks at center and corners tell them apart.
Illuminate Uniformly
Add consistent lighting across the field of view. Uneven lighting can mask focus issues by creating false contrast gradients.
Set Proper Exposure
Establish correct exposure settings using gray cards before focusing. See our detailed exposure setting guide below for OECF and ColorChecker procedures.
Thread Lens to Focus
Rotate in 1/16-turn increments (31.25μm axial movement). Watch for equal sharpness across all test points, not just center.
Lock and Verify
Apply UV+heat dual cure adhesive or mechanical lock ring, then verify no focus shift occurred during locking.

Professional Tip
Ceiling target focusing is standard practice at Commonlands' assembly facility, where production lines use precision ceiling fixtures with integrated lighting. Our assembly services cover production volumes from 100 pieces minimum order.
How Do I Focus C-Mount Lenses?
C-mount lenses have a fixed 17.526mm flange focal distance. You focus by rotating the focus ring, not by threading the whole lens like M12.
C-Mount Focus Procedure
- Mount lens to camera: Thread C-mount lens fully into mount until flange contacts. This sets the precise 17.526mm spacing.
- Set aperture: Open to maximum aperture for brightest view during focusing, then stop down to working f-number after focusing.
- Rotate focus ring: Turn the focus ring (not the entire lens) while viewing live image. Focus-ring travel varies by lens.
- Verify across field: Check center and corners at working aperture. Acceptable center-to-corner MTF variation depends on frequency, field, and wavelength.
- Lock focus ring: Tighten set screws on focus ring or apply removable thread locker to prevent drift during operation.
Commonlands C-mount lenses cover 1/2" to 1" sensors with low-distortion designs suited to measurement applications.
Quick Reference: M12 vs C-Mount
- M12 Thread Pitch 0.5mm per rotation
- C-Mount Flange Distance 17.526mm
- M12 Focus Method Thread lens in/out
- C-Mount Focus Method Rotate focus ring
How Do I Find Peak Focus Using the Overshoot Method?
Sweep through the relevant focus range and compare the measured sharpness scores. Passing one peak does not prove it is the best over the full range. After reversing direction, take up mechanical slack and approach the final setting from a consistent direction. Recheck focus after locking.

Why Overshoot Works
1. Eliminates backlash: M12 thread backlash varies by lens and holder.
2. Confirms global maximum: Passing through ensures you haven't stopped at a local peak.
3. Provides repeatability: Always approaching from the same direction gives consistent results.
Which Focus Locking Method Should I Choose?
The choice of focus locking method for board level cameras affects long-term stability, serviceability, and production throughput.
| Method | Cure/Set Time | Strength | Reversible | Best For |
|---|---|---|---|---|
| UV Cure Adhesive | Seconds to a minute (per datasheet) | Moderate | No | Indoor/controlled environments |
| UV+Heat Dual Cure | UV pass + thermal bake (per datasheet) | High | No | Automotive, outdoor, high vibration |
| Lock Ring | Immediate | Moderate | Yes | R&D, field-serviceable units |
| PTFE/Teflon Tape | Immediate | Low | Yes | Prototyping, temporary setups |
Commonlands Recommendation
For production volumes, we recommend UV+heat dual cure adhesive applied as a small fillet around the lens-holder interface. In our assembly work it holds optical alignment through temperature cycling better than UV-only cure. Validate the specific adhesive against your own environmental requirements.
How Do I Calculate Depth of Field?
Your DOF depends on focal length, working f-number, working distance, and the permissible circle of confusion, the blur diameter you accept at the sensor. That last term follows from pixel pitch, not sensor format, so two cameras of the same format with different pitches have different usable DOF.
Visit our Camera Depth of Field Calculator to determine optimal focus settings for your specific lens/sensor combination and working distance requirements.
How Do I Set Proper Exposure Before Assembly?
Set exposure before final focus locking so image quality stays consistent across production. Standardized targets, such as ColorChecker gray patches or OECF charts, support repeatable measurements. Use them to measure and reduce unit-to-unit variation within the acceptance limits for the camera. Lens transmission, sensor response, illumination, and processing settings can still differ.

Simple Exposure Setting Procedure
Position Gray Target
Place an 18% gray card or ColorChecker gray patch at your working distance under production lighting.
Set Standard Illumination
Establish your production lighting conditions. Document lux levels for repeatability across all units.
Adjust Sensor Settings
On an sRGB-like pipeline, 18% gray sits near code value 118 (46% of 255). The right target depends on your ISP.
Document Settings
Record exposure time, gain, and any ISP parameters. These become your production standards for all modules.
Critical for Production
Always set exposure parameters before applying focus lock adhesive. Exposure time and gain do not move focus, and among the exposure settings only aperture changes depth of field (DOF also depends on focus distance, focal length and magnification, and your circle-of-confusion criterion). Commonlands' assembly service includes standardized exposure calibration with professional gray targets.
What Are Common Focus Problems and Solutions?
These are the failure modes Commonlands sees most often in module assembly, with their root causes and fixes.
| Problem | Symptoms | Root Cause | Solution |
|---|---|---|---|
| Focus Drift | Sharpness degrades over hours/days | Mechanical loosening, weak locking | UV+heat dual cure, proper torque specs |
| Corner Blur | Center sharp, edges soft | Sensor tilt, field curvature | Check target alignment and lens-to-sensor tilt. Evaluate field curvature |
| Material Mismatch | Focus changes with environment | CTE differences, plastic elements | Athermal system design: optics, barrel and spacer CTE, adhesive |
| Vibration Loosening | Focus shifts during operation | Insufficient locking torque | Dual cure adhesive + mechanical retention |
| Unit Variation | Each camera needs different focus | Component tolerances stack-up | Active alignment process, tighter QC on components |
Professional Camera Module Assembly Services
Commonlands assembles camera modules with professional focusing, starting at 100 pieces minimum order quantity. Clean room facilities and precision alignment fixtures keep results consistent for robotics, surveillance, and automotive builds.

100 Piece Minimum
Ideal for pilot production and small batches without massive MOQs.
Backlit Vertical Targets
Leveled, verified targets that minimize left-right focus gradients.
Professional Locking
UV+heat dual cure standard, custom options available.
Quality Assurance
100% optical inspection and focus verification.
Fast Turnaround
2-3 week standard delivery for most orders.
Volume Scaling
From 100 to 10,000+ units with consistent quality.
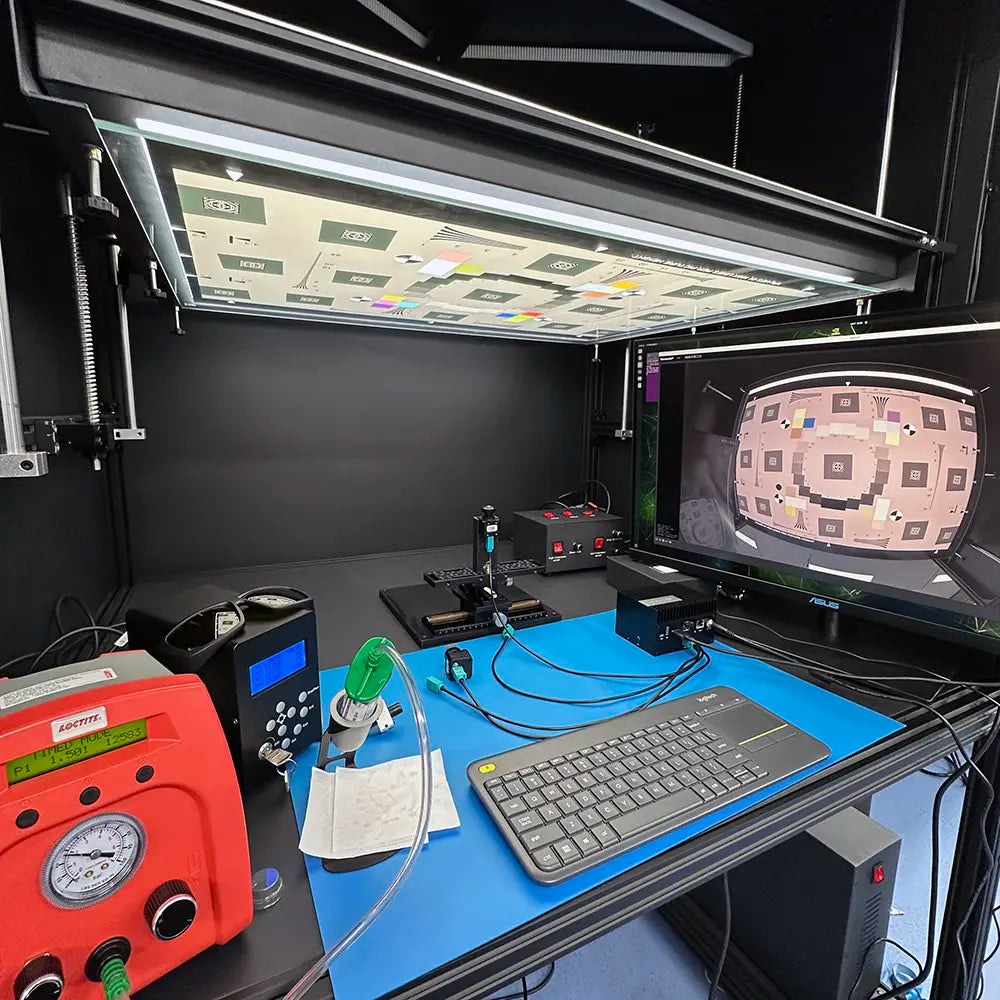
Minimum order quantity: 100 pieces. Learn more about our assembly services or contact our engineers to discuss your requirements.
Ready to Eliminate Focusing Challenges?
Our team handles lens focusing and locking so you can work on your application.
Get Assembly QuoteWhat Is Active Alignment? (OEM Production)
Active alignment optimizes focus while monitoring image quality in real-time, improving yield for high-volume OEM production. Whether it pays off depends on required yield, how tolerance-sensitive the design is, equipment amortization, cycle time, and how far passive fixturing gets you. The capital cost and changeover effort usually point toward large production runs.
The process uses 6-axis positioning with MTF or contrast feedback to optimize each unit individually.
When Active Alignment Makes Sense
When It Pays Off: No universal volume threshold. Yield targets, tolerance sensitivity, and equipment amortization set the break-even, usually reached in high-volume OEM production
Yield Improvement: Higher first-pass yield
Typical Applications: Automotive ADAS cameras, smartphone modules, high-end surveillance
Equipment Investment: Significant capital costs per alignment station
For lower volumes, manual focusing with proper fixtures and ceiling targets avoids that capital cost. Commonlands does not run active alignment: our camera module assembly service focuses lenses this way from 100 pieces, and automated focusing stations, each running 120 modules per hour, will be online for volume production by the end of 2026.
For the full technical breakdown, including the 6-axis error budget and UV-cure locking, read our active alignment guide for camera modules.
Frequently Asked Questions
What is the correct procedure for focusing an M12 lens?
Check safe thread travel and rear clearance first. Place a target at the required working distance, then sweep focus while comparing center and corner sharpness. Take up backlash and use a consistent final approach direction. Lock the setting with the specified ring or adhesive, then recheck focus. An M12 × 0.5 thread moves 0.5mm per full rotation.
How do I focus a C-mount lens?
C-mount lenses have a fixed 17.526mm flange focal distance. Focus is achieved by adjusting the focus ring on the lens barrel rather than threading. Use the same target and verification procedures as M12. Lock with set screws on the focus ring or friction tape. Browse our C-mount lens collection for options matched to your sensor size.
Why use ceiling targets for focusing?
A ceiling target provides a stable test distance and a convenient reference for leveling the target and camera fixture. That controls target-to-camera alignment. It does not remove lens-to-sensor tilt from thread or assembly errors. Use through-focus measurements across the field and adjust the lens, holder, or sensor alignment to correct those errors.
What's the difference between UV cure and UV+heat dual cure?
UV cure adhesive typically sets in under a minute but may leave shadowed areas that don't fully cure. A UV-and-heat dual-cure adhesive can cure shadowed regions during a thermal stage. The required temperature and time depend on the adhesive and must remain within the module's temperature limits. Cure schedule, adhesion, and outgassing are adhesive-specific, so follow the manufacturer's datasheet and qualify the joint on your own assembly. We default to dual cure for automotive and outdoor applications.
What is active alignment?
Active alignment adjusts lens position while monitoring image quality metrics in real-time. This compensates for component tolerances by optimizing each unit individually. It's most common in high-volume production where consistent quality is required despite manufacturing variations. The break-even against passive fixturing depends on yield targets, tolerance sensitivity, and equipment cost. The process typically uses 6-axis positioning with MTF or contrast feedback.
How do I prevent focus drift over time?
Focus drift is prevented by: 1) Using proper locking methods (UV+heat dual cure for production), 2) Selecting thermally stable designs (all-glass optics help, but drift depends on the whole system: element powers, barrel and spacer CTE, adhesive), 3) Allowing adequate cure time before handling, 4) Using mechanical retention as backup for high-vibration environments. Our assembly service includes validated locking procedures for long-term stability.
Can Commonlands assemble and focus my camera modules?
Yes. Commonlands provides complete camera module assembly: professional focusing, lens-to-sensor alignment, and permanent locking, using clean room environments and precision fixtures. Services include M12 and C-mount lens integration, custom fixtures, and 100% optical verification. Minimum order quantity is 100 pieces. Contact our engineering team to discuss your requirements.
What focus locking method should I use for my application?
For production: UV+heat dual cure adhesive. For R&D: mechanical lock rings for adjustability. For prototyping: PTFE tape for temporary holding. For automotive/outdoor: we default to dual cure for temperature resistance. For serviceable products: lock rings with thread locker. Each method has trade-offs between permanence, strength, and reversibility.